How to Setup Port Forwarding on Asus Router?
The Asus router smart Wi-Fi provides consistent wireless coverage for residential and business locations. Your internet services are always available because of its innovative networking technology and easy-to-use interface. Likewise, Asus router port forwarding makes it an efficient and effective network solution. To improve mesh performance, it becomes necessary to first understand Asus router port forwarding.
Furthermore, customers can enable hosting services or remote access by opening particular ports on the router with port forwarding. Whether you would rather use the native Asus Router app or the online interface, this article will help you with the entire port forwarding in Asus router procedure. Hence, continue to read this post to learn about the prerequisites and the first steps in the process.
What are the Requirements to Port Forward an Asus Router?
Ensure that you have the following arrangements in place before starting the port forwarding process:

Reliable internet access
Asus wifi router

Web Address

Asus router app

Admin information

Computer/Laptop
Ethernet cable

Static IP
What is the Easiest Way to Port Forwarding on Asus Router?
In addition, to allow remote access to your network devices, port forwarding is necessary. Certain applications and services cannot operate properly without the planned device receiving inbound requests in the correct route. Port forwarding is another way to guarantee secure and effective internet communication between your devices and the internet.
In addition, you can use the Asus router app and web address to port forward on the Asus router networking device. We also go over how to start and complete the process in this section.
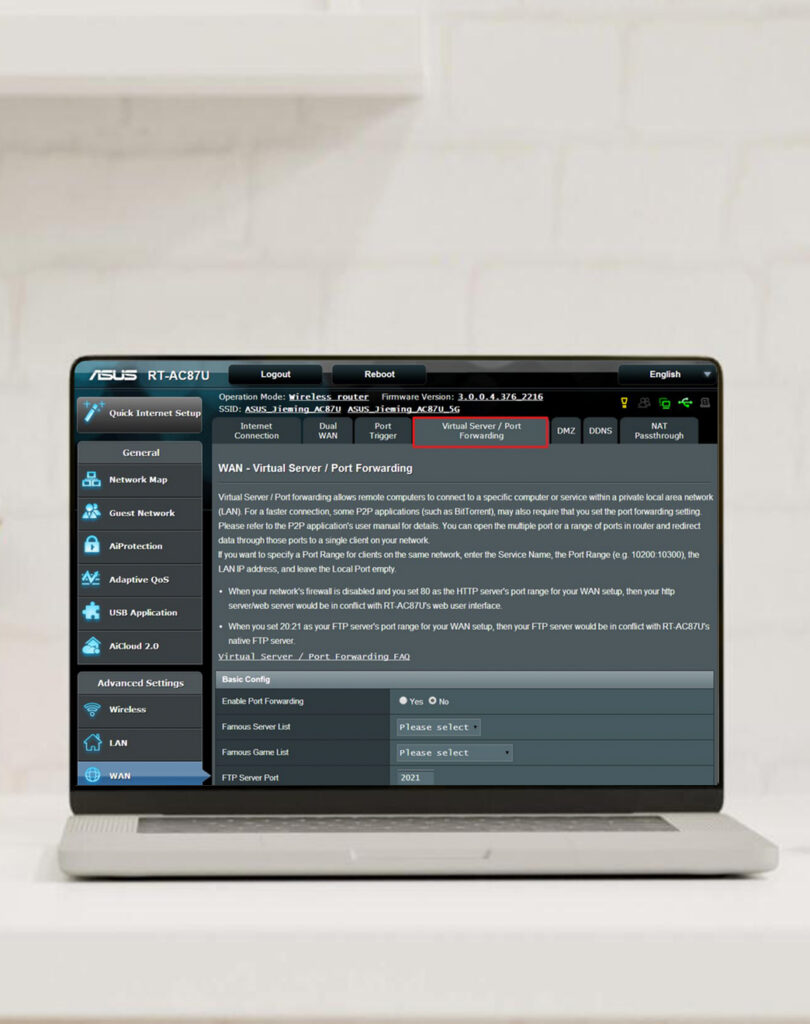
1. Port Forward on Asus Router Via the Web Address
- First, make sure your Asus router is turned on.
- Next, attach your laptop or PC to the mesh network.
- Now, launch a web browser and enter the web address router.asus.com.
- You get a prompt to log in.
- Enter your admin credentials here, then click “Login.”
- You are now viewing the mesh system’s smart Home dashboard.
- Setting a Static IP address for your Asus router is the first step.
- Thus, select DHCP Reservations and give your mesh system a static IP address.
- Next, select the “Advanced” or “Network” option based on the mesh devices you own.
- Enter the first static IP address that you were given.
- Additionally, on your Asus router, click on Port Forwarding and select TCP / UDP.
- Moreover, to add a new rule, click “Add New” or “Add”.
- Type a meaningful name for the port forward rule here.
- Look for the “External IP addresses” area and enter 0.0.0.0 there.
- If there is an “Enable” checkbox on your Asus gateway, make sure it is selected.
- Once you have completed the port forwarding on the Asus router process, click Save.
- Lastly, you can verify that your game server or an app endpoint has port forwarding configured.
2. Port Forwarding Using the Asus App
- Installing the Asus router app on your smartphone should be your priority.
- The software is available on the Google Play Store for Android users and the software Store for iOS users.
- Open the app, and register for an account here.
- Use your admin credentials to log in if the app is already open on your smartphone.
- After logging in, go to the “More>Advanced>NAT Forwarding>Port Forwarding” section.
- To add a new rule, click the “+” icon in the top right corner and select “Add New Port Forwarding Rule” or a comparable option.
- Next, choose the kind of service, enter the service name, and then select Internal IP.
- To add a port forwarding rule, enter the External Port and the Internal Port (Service Port) and click Save.
- Input the device’s local IP address as well if you wish to forward the ports to it.
- To make managing the port easier in the future, give the regulation a catchy name.
- To save your settings, click “Save” or “Apply” at the end.
Why is Port Forwarding in the Asus Router Not Working?
Moreover, port forwarding in Asus router typically malfunctions for several reasons. Furthermore, it can be especially the result of incorrect settings or failure to supply the router unit with a static IP address. Occasionally, errors can happen if you omit or provide false information in the External IP address column.
How to Fix Asus Router Port Forwarding Not Working?
Furthermore, setting up Asus router port forwarding is a difficult but possible process. All you have to do is attentively follow the guidelines. Likewise, users may experience port forwarding failure and other problems when they become confused about this process. We provide the pertinent troubleshooting techniques below to help them:
Enter the Correct Port Numbers
- Verify again that the port numbers you specified for your service or application are valid.
- You are unable to continue if they are wrong.
- Enter the accurate information now.
Resolve Obstructions From Firewall/VPN
- Your port forwarding settings will conflict if you have another firewall configured.
- Verify that the forwarded ports are permitted for traffic by your firewall rules.
- Disable it for a while if they don’t.
- Once the process has been completed, re-enable it.
Contact the ISP
- Certain ISPs (Internet Service Providers) restrict the use of port forwarding.
- If they employ carrier-grade NAT, your ability to forward ports may be restricted.
- Thus, get in touch with your ISP to see whether any limitations are in place.
- Turn on your router again.
Power Cycle Your Asus Router
- It can fix any short-term issues.
- Take out the router, computer, and then modem.
- Wait for 30 seconds approx. and replug them.
Factory Reset Your Router
- Perform a factory reset if nothing else works to fix the problem.
- Look for the reset button on your router.
- Press and hold this button for at least 10 seconds.
- When the LED is flashing, then release the button.
- Wait till the router completes the reset process and reboots itself.
- Finally, the router gets back to its default settings.
The Bottom Line is
Overall, setting up Asus router port forwarding is a complex process somehow, but it is not impossible if you follow our instructions carefully. However, the networking capabilities of the router are substantially improved via port forwarding. In addition, to set up port forwarding on your networking gateway, you can use the above-mentioned methods, including the Asus router app and web interface. If you experience any issues during the process or if the Asus router port forwarding not working, you can walk through our troubleshooting section. Still, seeking more information? Drop us a line here!